Picture Here
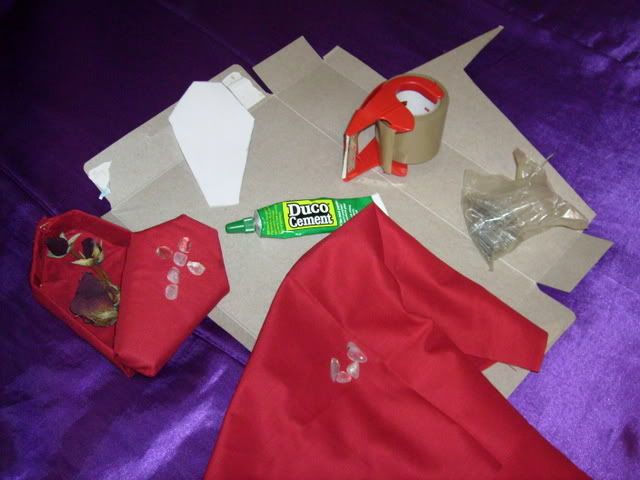
I'm sorry if my instructions are incoherent. I've never been good at explaining things but it all makes sence in my head.Also, the above coffin jewelry box is a little messy. I'll post a prettier one soon.If you are using Super Glue make sure that the room is ventilated. I didn't and I was a little dizzy after a while.
Materials
Cardboard (mine's from a cereal box)
Printer paper
Scissors
Tape (duct or wrapping tape)
Super Glue/Art Tacky
Paper clips
Fabric (mine was scrap from my cousin's halloween costume)
Gems, lace, etc as decoration (i used quartz b/c it was lying around)
1. Cun a coffin shape from some printer paper. Mine was 5 inches long, 3 inches at the wides, 1 inch at the shortest width. Make sure its symmetrical. If you need to fold the paper down the middle once you cut it out. This will be your stencil.
2. Use the stencil to draw the coffin onto the cardboard. Measure out 1 and 1/2 inch out on all sides and creat a rectancle from each side of the coffin shape. This will be your coffin base.Use the sencil again on the cardboard and measure out 1/2 ince rectangles on all sides. This will be your lid.
3. Cut out the cardboard coffin shapes (DO NOT CUT THE RECTANGLES OFF THE COFFIN SHAPE). Fold along the boarders of the rectangles and coffin shape and tape each corner together a couple of times for stability.
4. Cut the fabric into a coffin shape large enough to cover the coffin base, sides and fold in. Then glue the bottom of the base to the center of this fabric (careful if you're using super glue, i got it all over my fingers >.<)
5. Once the bottom dries fold in the fabric (good gift wrapping skills come in handy here) and glue alogn the insides one side at a time. Once the fabric of one side is down use the paper clips to hold it until dry. Repeat.
6. Do the same with the lid only do not glue the top of the lid to the fabric as the glue shows through a little. Instead glue the fabric to the inside of the lid only. Use small paper clips to hold here.
7. Use stencil to cut out fabric for the inside bottom of the base and inside of the lid. Glue.
8. Decorate once dry.
Tell me if you need more of an explaination.
14 years ago
No comments:
Post a Comment